In this post lets take a look at how we can add parameters to a BI Report in Oracle Cloud. Before reading this blog, read my blog on the basics of creating a BI Report in Oracle Cloud. I will be using the same SQL, data model and report in this example. Click here to read the blog.
The Basics
Parameters let the developer use the user input(s) to limit the data that is being fetched by the SQL query and in turn being displayed on the report output. In many cases adding parameters also improves the report performance as less amount of data needs to be fetched based on the user input, rather than fetching the universe of data.
There are many instances where you would want to add parameters to your report. Here are a few I can think of:
- AP Invoice or AR Invoice details for a given date range
- Payment details based for a given supplier
- Budget vs Actual data for a given month, cost center
- Payment details for a given invoice or set of invoices
The different types of parameters in Oracle Cloud BI are:
- Text
- Menu / List of Values
- Date
Add Parameters to your Query
Now lets take a look at how to add the parameter to your sql query in the data model. I have the below query:
SELECT period_name, period_year, period_num
FROM gl_periods
Now I want to filter the results based on a particular year. The user will be prompted to select a value for the Fiscal Year and the period data will be displayed based on user input. To achieve this I will be changing my query as below:
SELECT period_name, period_year, period_num
FROM gl_periods
WHERE period_year = :p_period_year
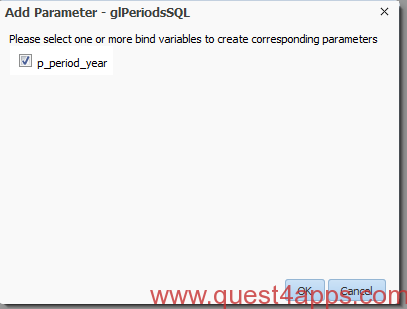
If you notice the new query, I have added the condition “WHERE period_year = :p_period_year”, where p_period_year is the Parameter Name. If you look closer you will see that there is a “:” before the parameter name. This helps the system to identify the literal as a parameter. Once you make changes to the query and click OK, the system prompts you whether to create the new parameter and include the parameter in the query. Select the check box and click “Yes”. See below screen shot for more details.
Save the data model.
Parameter Properties
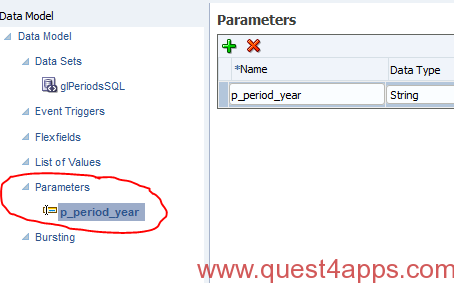
On the left navigation pane, click on parameters. You will notice the system has automatically created the new parameter with the name p_period_year. On this page you can set the following:
- Data Type : select the data type from String, Date, Integer, Boolean, Float values
- Default Value: You can set up a default value for the Parameter.
- Parameter Type: select the parameter type. It can be Text, Date or Menu.
- Row Placement: set the row placement for the parameter. If there are multiple parameters and if you want to place the parameters in different rows you use this property.

The lower section of the page is to enter additional details for the parameter. This includes Display Label, Menu details etc. The fields available in this section varies based on the Parameter Type. Here is a comparison of the fields based on the parameter type
For a text type parameter you will see the following additional fields.
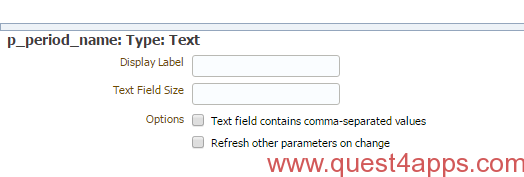
Display Label : The label that is displayed on the report for the Parameter
Text Field Size: The size of the parameter field
You will also see options to
- Set if the value entered in the field contains comma-separated values
- Refresh other dependent parameters
For a date type parameter you will see the following additional fields:
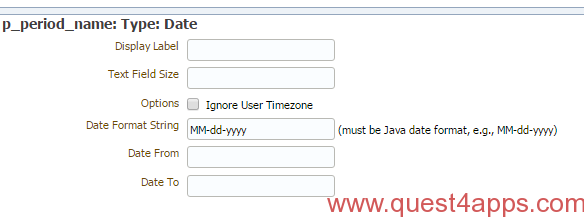
Display Label: The label that is displayed on the report for the Parameter
Text Field Size: The size of the parameter field
Ignore User Timezone: If you check this option, the system will ignore the User time Zone
Date Format: Date Format
Date From: The calendar will show date values that fall after the value entered in this field. For eg, if you enter 01-01-2017, the calendar will show date that is always greater than or equal to 01-01-2017. You will not be able to see any date value for the prior years.
Date To: The calendar will show date values that fall before the value entered in this field. For eg, if you enter 01-01-2017, the calendar will show date that is always less than or equal to 01-01-2017. You will not be able to see any date value for the subsequent or future years.
For a menu type parameter you will see the following additional fields:
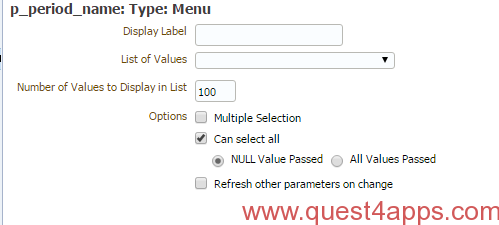
Display Label: The label that is displayed on the report for the Parameter
List of Values: Assign a list of value to this Parameter. The user will be able to select a value from the list of values
Number of Values to Display in List
You will see options to
- set whether the user will be able to select multiple values
- set whether the user will be able to select “All” values
- NULL Value Passed (if user selects all, if NULL value will be passed to the query in the data model)
- All Values Passed (if user selects all, if ALL the values will be passed to the query in the data model)
- Refresh other dependent Parameters
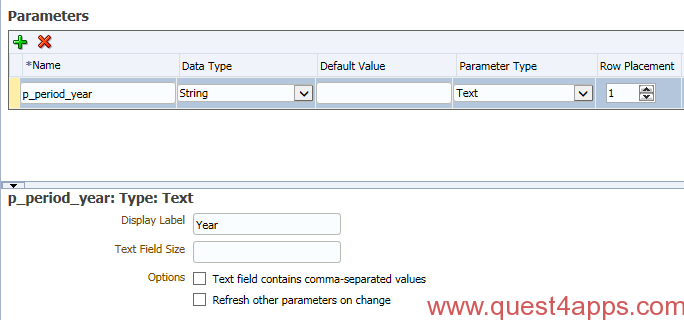
For our example lets select the Parameter Type as Text and set the Display label as “Year”. Once you have done these changes, the parameter should look like this:
Save your data model.
View the Parameter Changes in the Data Model
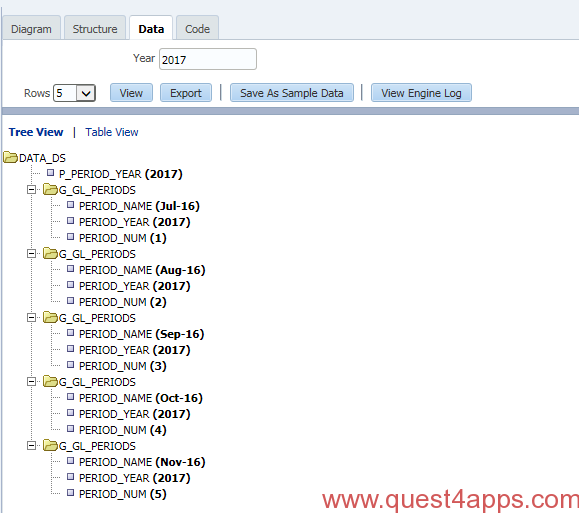
To confirm the changes to the data model, click on the data set and the click on “Data” Tab. You will see the new parameter as shown below:
Click View and once data is displayed on the page, click on “Save as Sample Data“. Save the data model changes.
View the Report
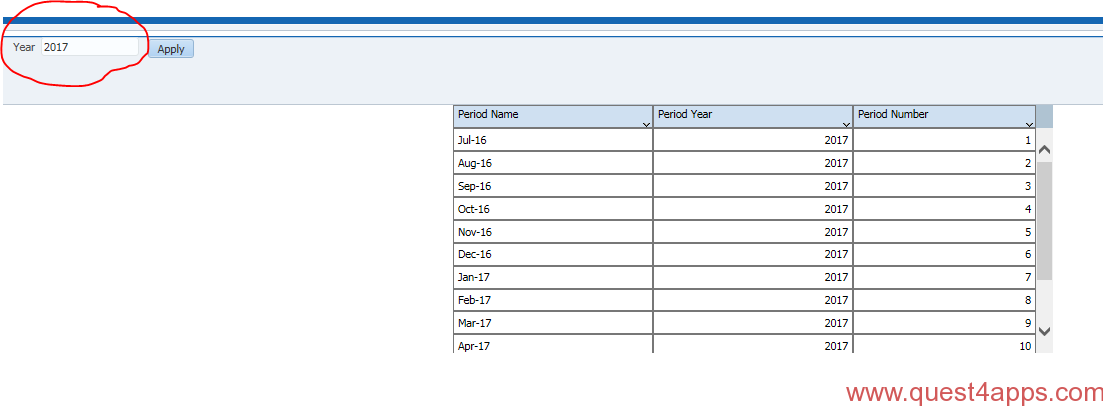
The final part of this exercise is to open the report and confirm that the parameter is visible on the report. Navigate to the folder where the report is saved. Click on “Open“.
You should be able to see the Parameter on the report. Select the year 2017 and click on “Apply“. Voila the report now shows the data based on the year selected by the user.
This was a very simple example to help you understand how to add parameters to BI Reports in Oracle Cloud. I hope this helped you. Please leave your suggestions, feedback or questions in the comments section. Happy Reading!!





Questions? Comments? Suggestions? Let us know!! Like / Subscribe / Follow for more updates.